![]()
Keep it brief with a QRG!
These days, who has the time to read loads of stuff in a manual?
Not many, thankfully.
That’s why I tend to recommend my super-brief format known as the QRG.
The QRG (or Quick Reference Guide) is a strict 2 page format that shows a single process only, in graphical steps.
This 2 page format keeps it brief and allows it to be printed using one piece of paper. The graphical steps are there to stop a Trainer writing too much text.
Here is an example of the first page of a typical QRG:
QRG example page 1 with green commentsIt shows the process steps and the small amount of text that is used at the start in order to set the context of the guide.
The process then continues onto page 2 if necessary and an optional “Things to Remember” section at the end showing a small number of bullets that allow extra things to be explained.
QRG example page 2 with green commentsWhat applications are used to create QRGs?
I create them using Microsoft Publisher and then export to PDF for easy sharing, (perhaps via corporate intranets).
![]()
Publisher is a good choice for several reasons:
- It’s part of Office 365 and so is available to most business users
- It has the same graphical tools as PowerPoint and so is familiar
- It is a desktop publisher and so you can place both text and images where you want (they’re all in frames for easy moving)
- You can store sections of text and graphics for recall later on (to speed up the production process)
QRGs are graphical, so they need quality screenshots.
I use Techsmith Snagit to capture the screenshots. It has a really good editor as well which enables you to polish the captures you make.
![]()
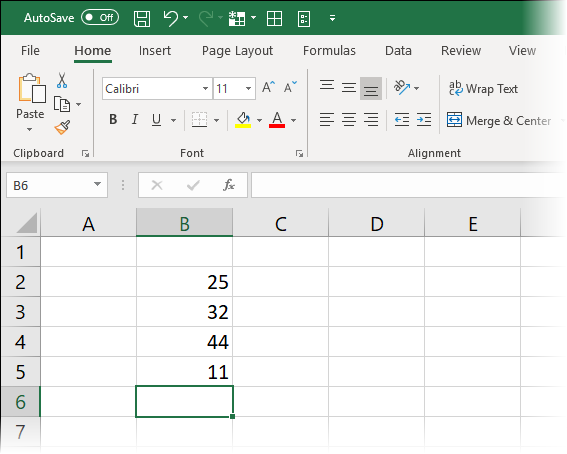
To make the screenshots fit onto the page, sections that are not relevant need to be cropped off. To enable the users to realise which bits are missing, I like to use an effect on the screenshots.
This is the fade effect…
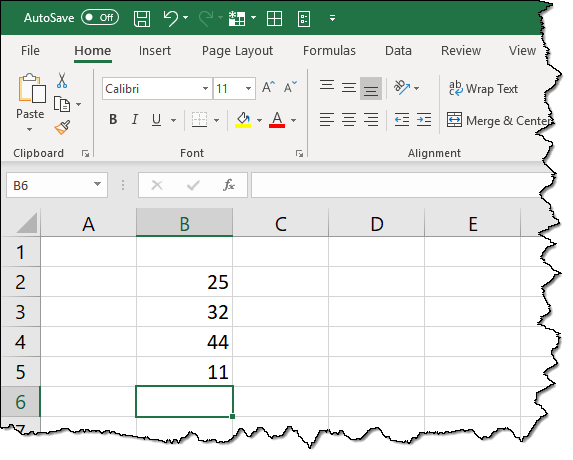
This is the tear effect:
To be honest, a good QRG is all about the screenshots. Each step needs to be clear, they need to be populated and have a cursor present (preferably over the button that is being clicked).
If you can picture your process steps well enough, you’ll need very little, (if any) text.
QRG Graphics
To help minimise text and to make things obvious to the user, I like to use a range of graphics on my QRGs…
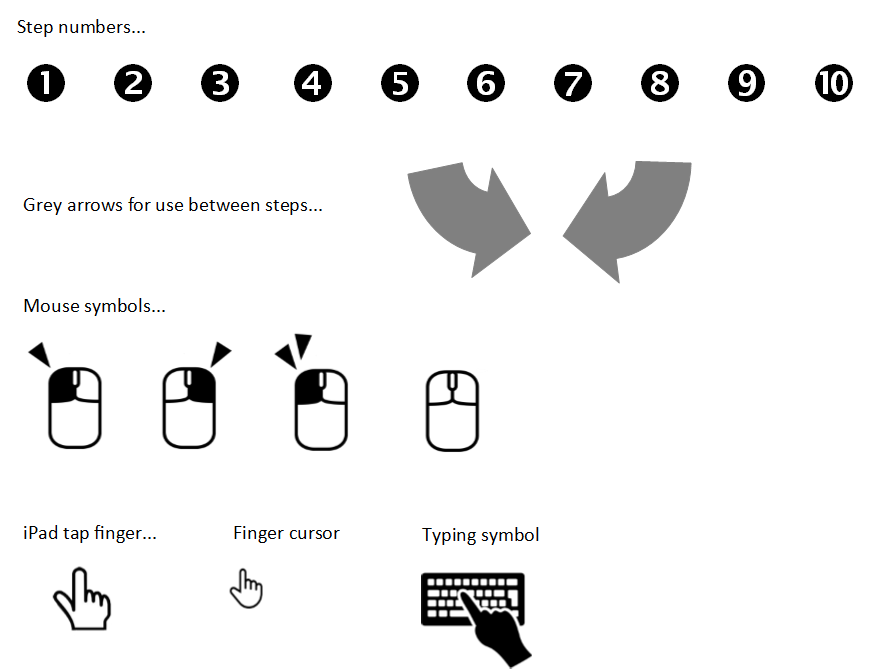
The step numbers are actually characters from the Wingdings font – this enables me to change their colour when a corporate marketing team want their QRGs to adopt an in-house style.
You get them from the Windows Character Map…
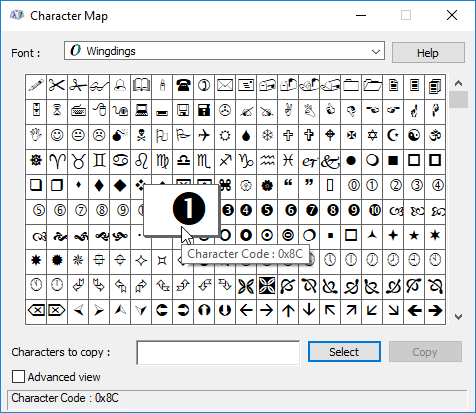
With them being characters (rather than graphics), they also look sharper when you create the PDF.
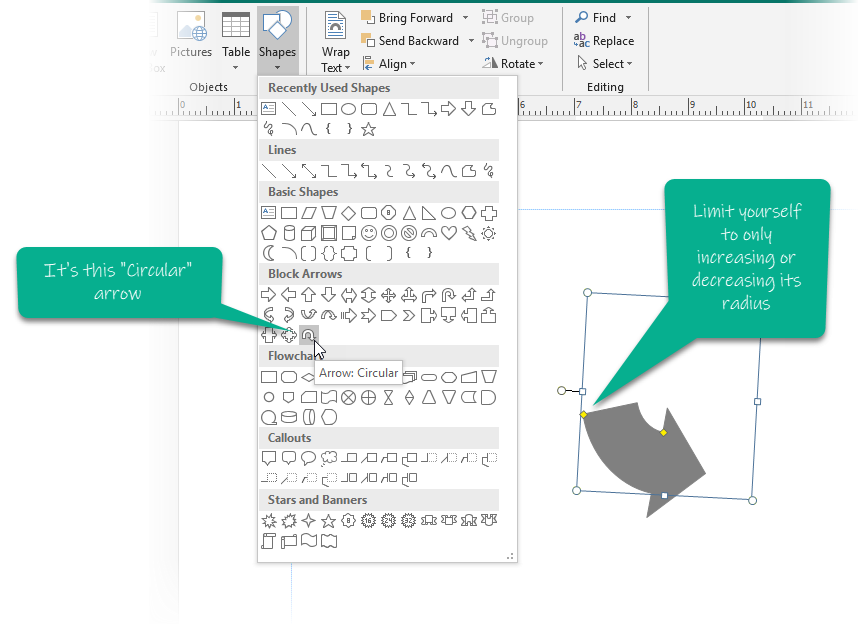
The block arrows are a “shape” from Publisher (they are also present in other Office 365 apps). This enables you to change their colour as well, but you should make sure you keep their thickness the same in all your QRGs.
This is to give you consistency – a key attribute that sets your materials above amateur level.
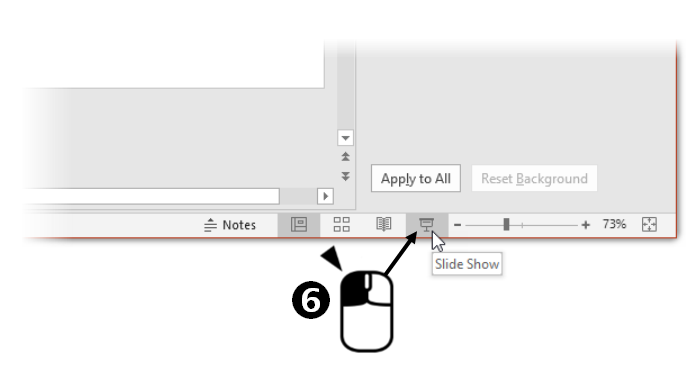
The mouse symbols are there to prevent you having to write their text equivalent…

When you’re doing QRGs about devices that don’t use a mouse, you can use the finger tap equivalent symbol…

It’s also important to capture screenshots with a mouse cursor in them. It helps a user understand that they are clicking on a button. When you combine it with a step number and a mouse symbol, you get the full effect…
Things to Remember
The QRG explains only a single process.
When this process is over, what happens if you need to say something else? Something related to the process, or maybe something that you feel is important that needs to get mentioned somewhere.
This is where you use the “Things to Remember” section…
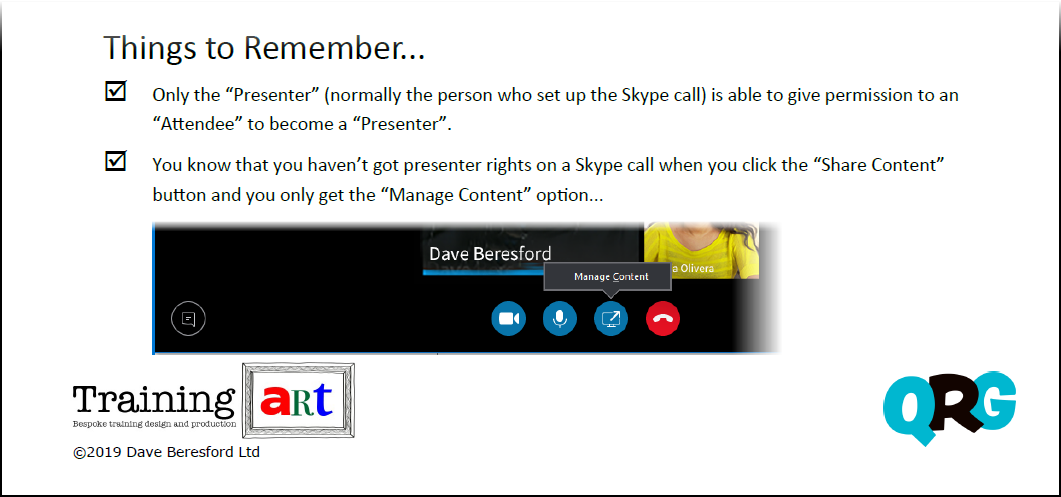
The above example is giving you two related facts to the main process of this QRG (which is Setting an Attendee up as a Presenter in a Skype call). There is even a screenshot to illustrate the point.
In general, use as many bullets as you have the room for, but avoid putting in another process. If you have another process, make it a separate QRG.
Where do I go from here?
Have a look at a few examples from my website to see QRGs in action. You can download them from the following posts so you can look at them in detail:
Bypassing Do Not Disturb on your iPhone
Making a Skype Attendee a Presenter
Creating a Signature in Outlook
Run Out of Desktop – Create a New One!
If you have further questions from there, contact me here and I’ll be glad to coach you or your trainers in the sacred art of the QRG!