Adobe Captivate is brilliant for producing e-learning “demos” on popular pieces of software.
You know the thing, you record yourself doing something in the software (some task or process) and after a bit of editing you get a nice little demo that shows people how to do that thing.
The only problem is that they can lack context and your learner might not “get” what the application is for. Especially if it’s something bespoke i.e. not your obvious kind of app like Outlook or PowerPoint.
This is why I like to create small animations that explain the high level…
…high level?
Typical context setters might be:
- How does this process work?
- What is xxx?
- Why we do xxx?
Here’s an example:
This animation shows the learner how the process (in this example) works at a high level and helps them understand where any demos for parts of the process may fit in.
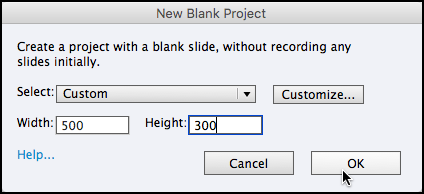
You’ll notice the size of this animation – it’s quite small.
In fact it’s 500 x 300 pixels since these smaller animations can then be embedded into a web page or in this example, SharePoint. (You don’t want any embedded animations to be too big, otherwise they may slow down your web or SharePoint page).
Depending on your version of Captivate, you start off with a blank project…
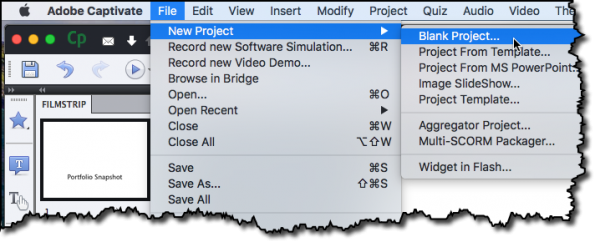
then, define the size
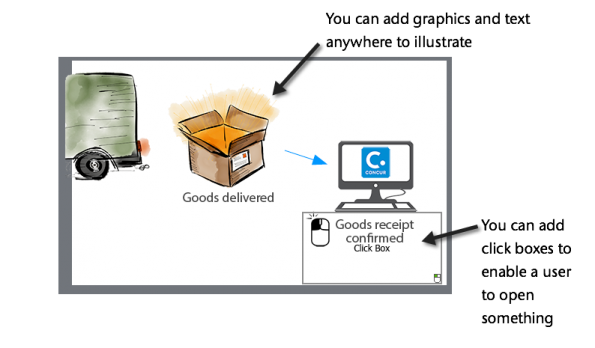
Then, with a clear canvas, you can add text and graphics across multiple slides to illustrate the process that they need to know:
eg.

Tip: make sure before you start that you create a quick storyboard to ensure you have a clear direction.
Things to Remember
- When you finished your animation, it’s a good idea to try it out on a few prospective learners to see if your storyboard ideas and the way you’ve illustrated it work for real.
- Linking (via click boxes in Captivate) to external resources or other Captivate demos is a great way to get learners into the topic and really encourage ad-hoc learning.
- Use optimised (compressed) imagery in animations especially if they are to be embedded in a SharePoint or web page. aim for each image to be under 50KB and the final published demo to be no more than 1MB.