Look a bit deeper than “Dark Mode”…
Yes, it’s all very good to make your screen windows go a bit dark, but the new version of the Mac operating system, known as Mac OS Mojave has more than that going for it!
Ok, I am a sucker for the desert screen dynamic background that changes throughout the day automatically…
…but if you look a bit deeper, you find some really useful things in Apple’s new software offering.
First things first, should you bother upgrading?

Yes, in short.
You should always upgrade your computer’s operating system (that’s the software that controls it and allows you to run programs and store stuff) – especially if it’s free!!
It’s always going to be more secure, more feature-rich and of course will work better if you have an iPhone or iPad that is also running the latest version of their mobile operating system, namely iOS12.
So when looking through the list of new features, which one did I like the look of most?
Capturing screenshots or recording screen activity
Taking screenshots on the Mac has always been a bit rubbish, especially for those of us who need to do this for a job. There are lots of great screenshot gathering and capture applications out there – I use Techsmith Snagit and for video capture a product called Capto.
However, in Mac OS Mojave, Apple have managed to come up with a much better screenshot tool. Here’s how it works…
Press Shift + Cmd + 5
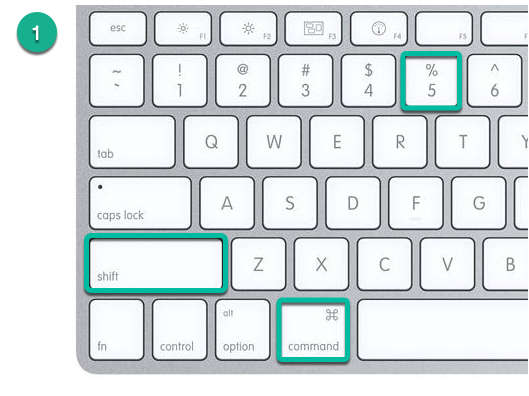
and you’ll get this:
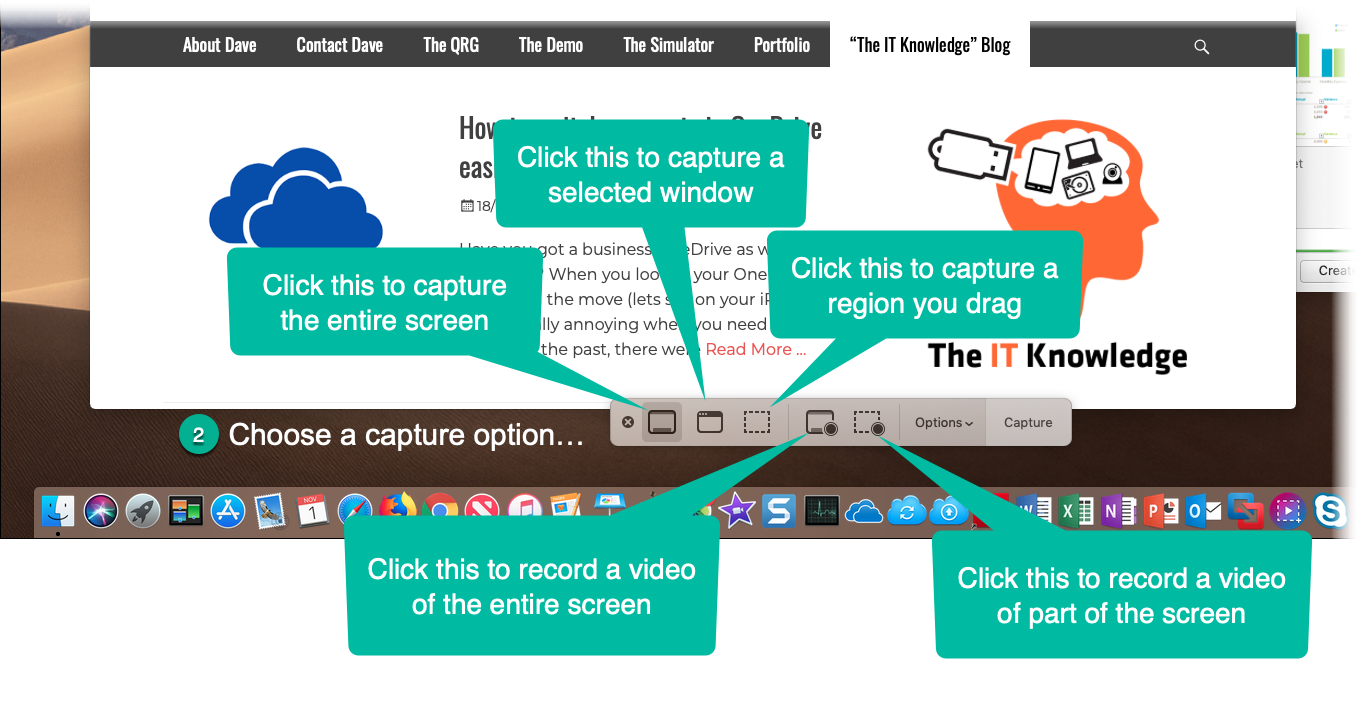
You choose a capture option – either you want a still of the screen (full, window or region) or you want to record a video of the screen. The video at the top of this post was a recording I made using this feature – I captured the active demo of the Mojave dynamic screen background as an example.
Then you can select an option from the menu…

Here you can choose where to put your screenshot or recording (“Desktop” is the default), whether a timer is needed, (useful if you need to get things sorted before capture) and whether you want the mouse pointer to be included. This last option is powerful when you are trying to show things in applications – the presence of the mouse pointer often helps add emphasis.
The click on the “Capture” button…
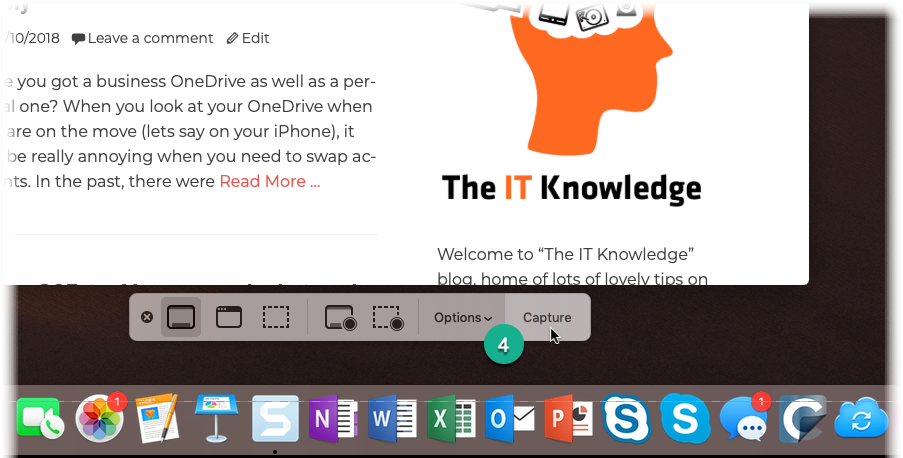
The screenshot is then saved to wherever you decided to put it.
You just open it and use it from there.