SharePoint is a really great platform for training materials in a larger organisation.
It’s easy to upload printable materials (in PDF format) and e-learning content as well. But SharePoint pages can be a bit dull, especially if the organisation has strict branding rules or some form of restrictive governance.
One way I like to make Sharepoint pages more attractive (and more useful) on a training site is to embed an animation I have made using Adobe Captivate.
All you need is a bit of HTML code and the published form of the Captivate demo already uploaded to a SharePoint Library. The design of the animation itself is important [see my previous post] – they shouldn’t be too big (I suggest 5-600 pixels wide, though this will depend on your SharePoint page template) otherwise you’ll have page performance issues.
Once you’ve uploaded the published version (in this case I’m assuming you’re using a published demo in Flash format) to a Library, all you need to do is use the HTML Editor on the page and add the following short bit of code:
<embed src=”[pathway to the Flash file – ends in .SWF]” width=”585″ height=”300″></embed>
(The height and width above are the pixel dimensions of the Captivate demo you created).
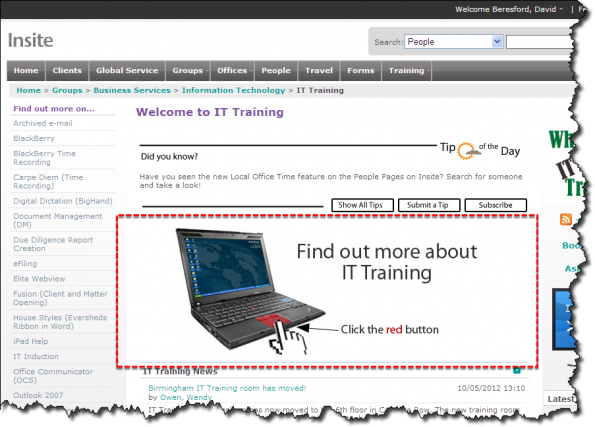
The final result would look something like this on a SharePoint page:
Things to Remember
- Whether the animation is static or moves initially is up to you and the way you design it in Captivate – I favour one that moves initially and then comes to a rest at some point.
- You can use such animations as cue to the user to click on something or as a fancy way of navigating things, (the above example encourages the user to click to find out more about IT Training, though doesn’t penalise or annoy the user how’s a second time visitor)