Got a few too many things on your device?
This can be a problem with an iOS device (iPad or iPhone). You look at your storage space and find there’s hardly any left!!
So what can you do to save space?
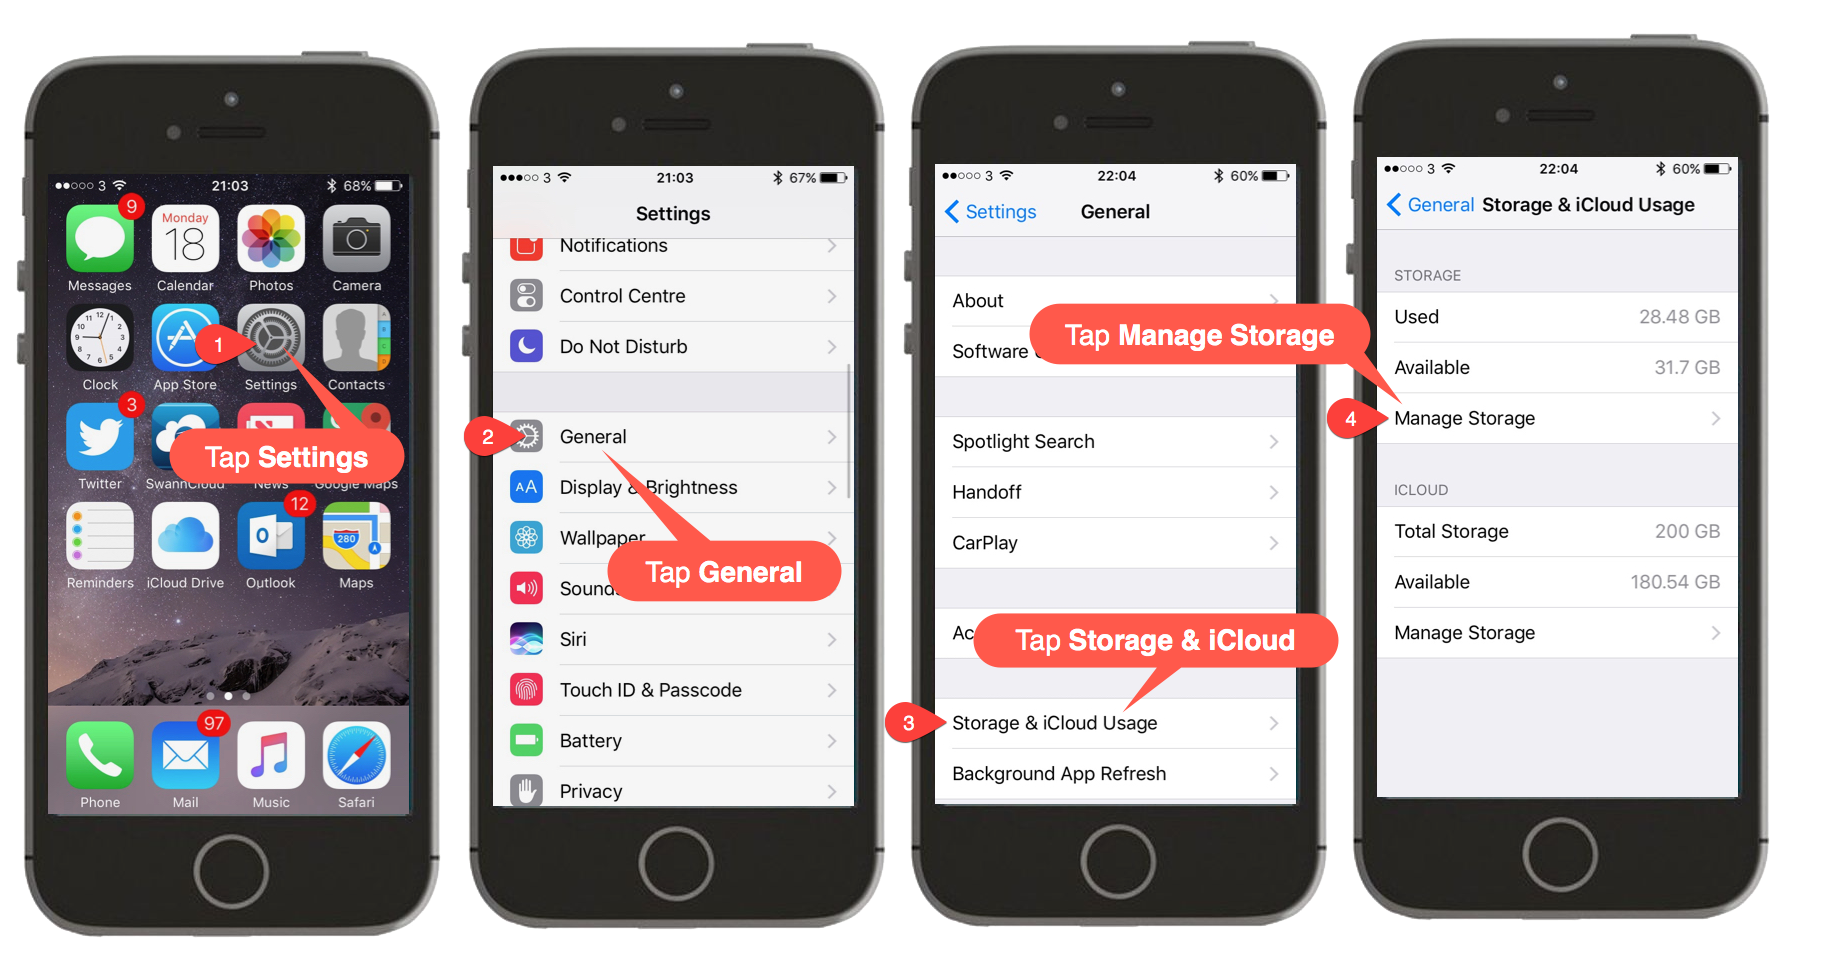
First of all, you need to check how much space you are actually using. To do this, try the following on your iOS device:
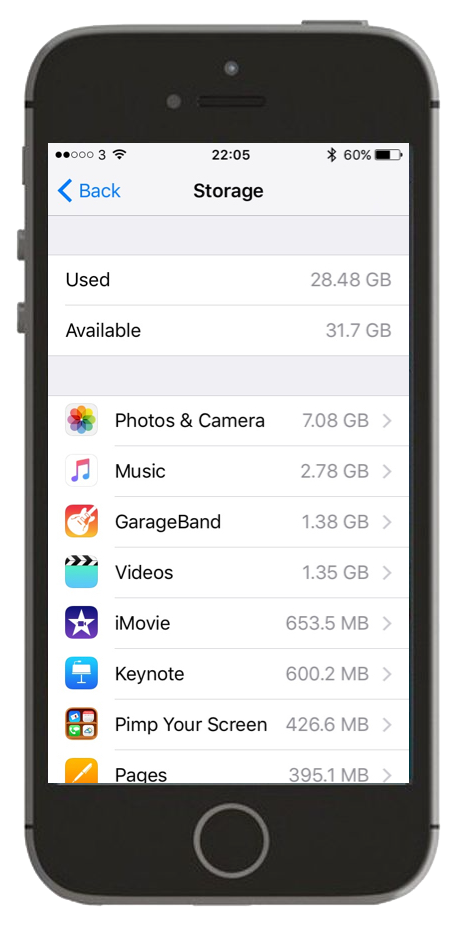
Once you tap on “Manage Storage”, you then see a list of what is using up the space on your device…
Although this iPhone still has quite a lot of storage available, we can see what is using the storage space on the device.
The biggest culprit (Photos & Camera) is at the top and as we scroll down the space taken up by each App decreases.
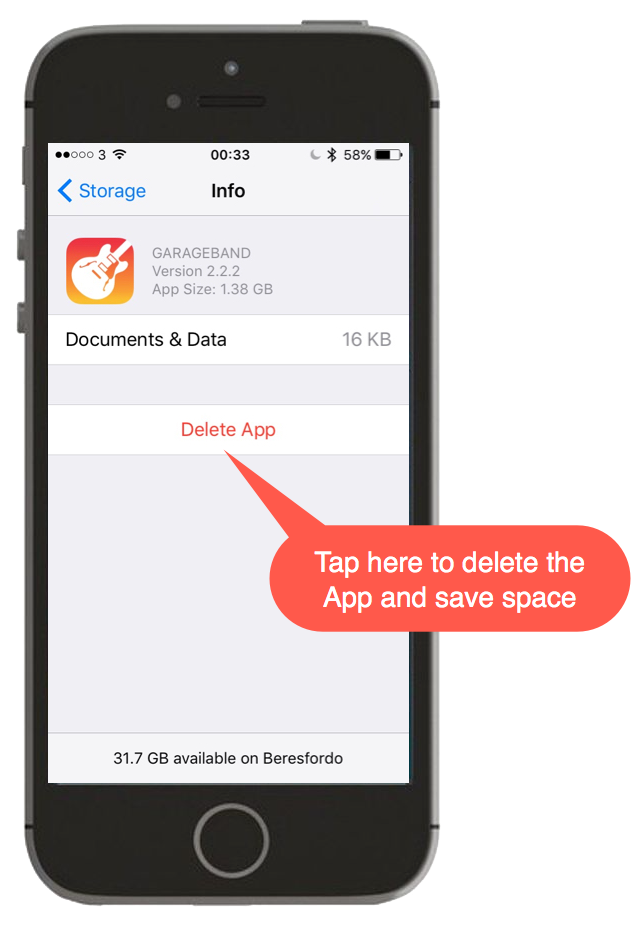
When you tap on an App, you get the chance to do something about the storage space it is using…
Everyone is different…
It’s not always going to be the same Apps at the top of the list, it depends on what you use.
But what are the usual suspects to look out for?
- Photos & Camera – we all take photos but it’s the videos that will be taking up the real storage!
- Music – downloads can add up!
- Videos – this is different from the ones you’ve created, these are movies or TV programmes you’ve downloaded
- Messages – if you text a huge amount, expect to see this one up there!
Apart from the top two on this list, the basic way forward is to delete things you no longer need (as in the example above).
How do we deal with Photos and Music content?
They are a bit of a special case, so what can you do with them to save space?
Photos and Camera
Probably the biggest item for most people, here are a few things to consider…
1. Invest in some iCloud storage…
It only costs a few pence a month (as of Sep 2017), to increase the basic 5GB of iCloud space you get for free with your Apple device. For 50GB of iCloud space you only pay 79p per month and that could enable you to store your entire collection of Photos and Videos in iCloud.
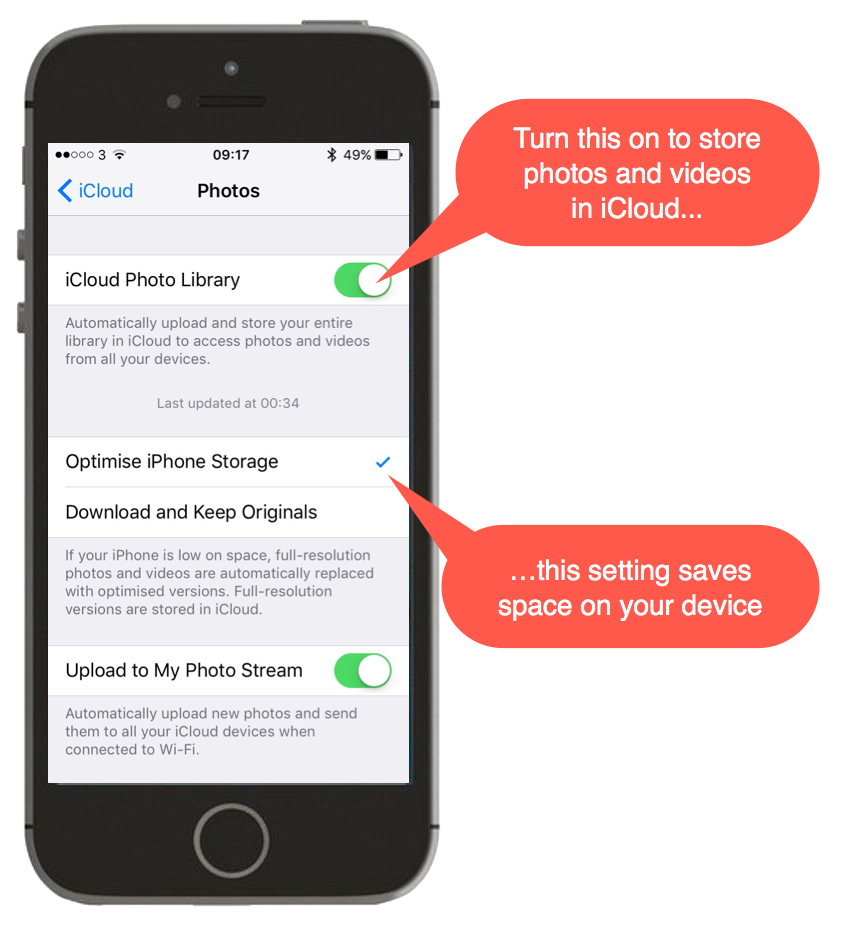
By doing this, you need to realise that the content is still on your device. You can store the high resolution versions in iCloud though and only the lower quality (and smaller) versions on your device and save loads of space. Once you’ve purchased the extra iCloud storage you switch on iCloud Photo Library
Tap Settings > Tap your name > Tap iCloud > Tap Photos and switch on iCloud Photo Library…
Then use the Optimise iPhone Storage option to keep smaller versions of your content on the device, thus saving loads of space.
There are 2 other major advantages of storing your photos and videos in iCloud:
- Your content is available to your other Apple devices (almost instantly!)
- You can access the photos and video from a Windows PC if you are running iCloud for Windows on it (see my post on this)
2. Download content to your computer…
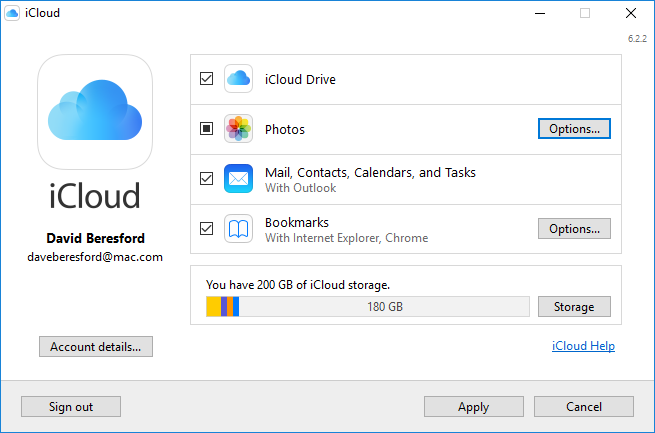
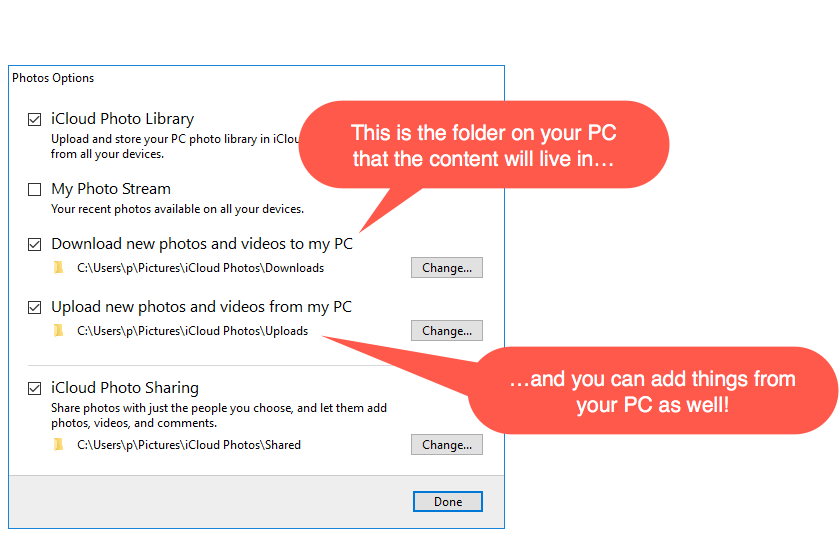
In fact, iCloud for Windows enables you to download automatically all new photos and videos directly to your computer. Tap “Options” next to “Photos” on the iCloud for Windows dialog…
…and you can choose to download the content to a folder on your PC…
This is great, because you’ve always got the photos and videos if you need to remove them altogether from your device and iCloud.
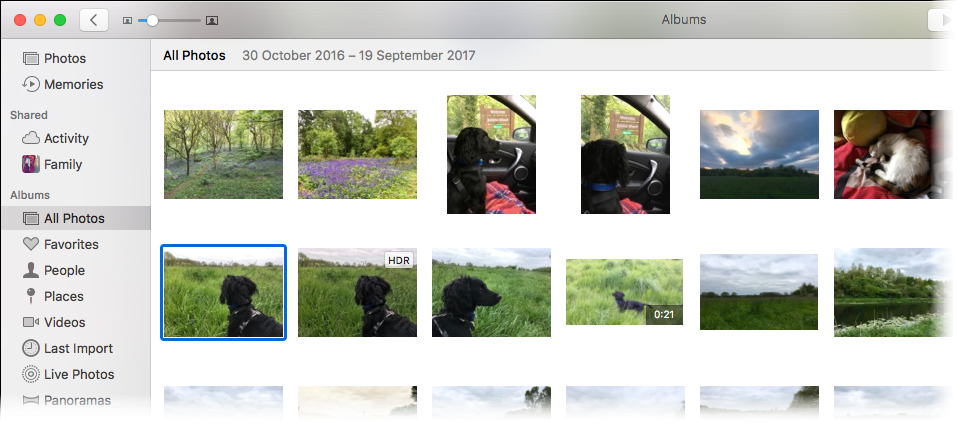
If you have a Mac, you have Photos…
Which means you can share these photos and videos directly to other places on the Web or download them to your machine and save them.
3. Share your videos to your social media, then delete…
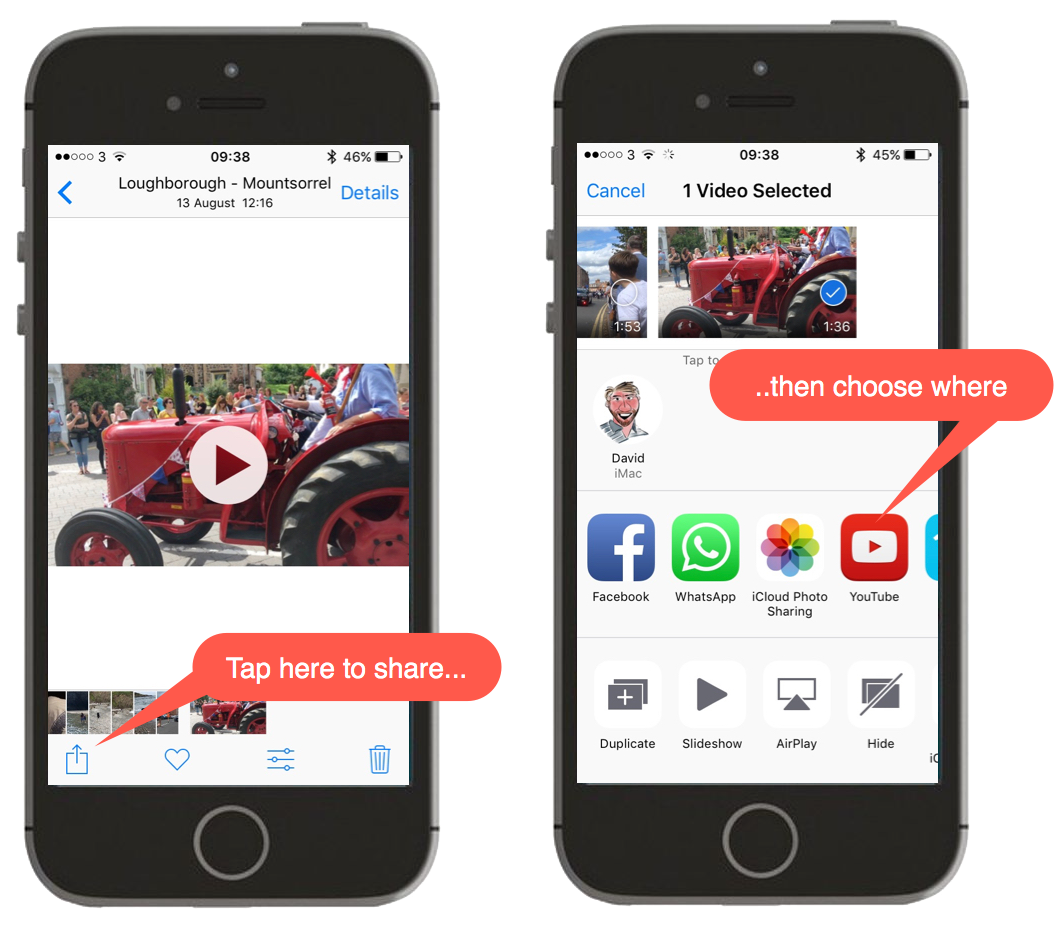
If you don’t want to pay for extra iCloud storage, use the Share button on a video in the Photos & Camera App. Then send it somewhere like Facebook or your own YouTube channel. (You don’t have to save your video publicly on YouTube after all, when you upload it – just set this to “Private”).
Then, once you’ve shared it – delete it and save some space!
Music
There are several things you can do to solve your music problem…
1. Invest in iTunes Match…
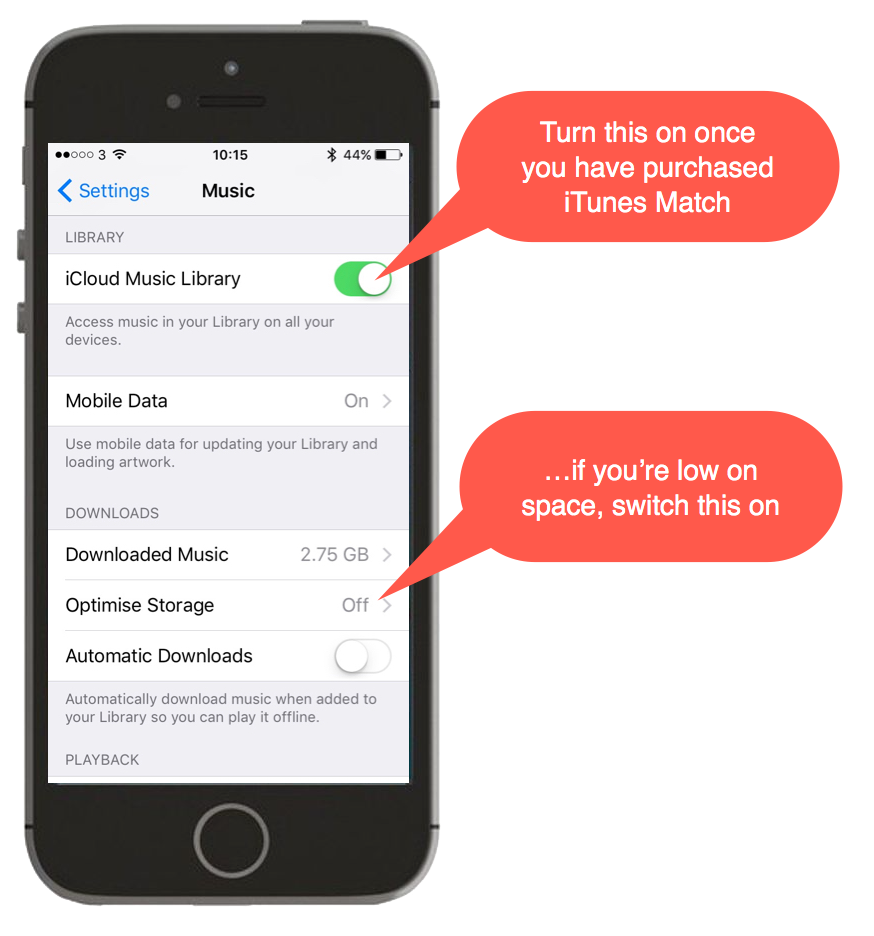
This is another iCloud thing. For £21 per year you can subscribe to Apple’s “music in the cloud” service. When you pay the money and switch this feature on (Tap Settings > Tap Music and scroll down) it will upload your entire music library to iCloud.
It “matches” anything you have in your library with the equivalent track in the Apple library and any that aren’t in iTunes are just uploaded. (So even that obscure “Umpah” album from 1976 you have will still be available!)
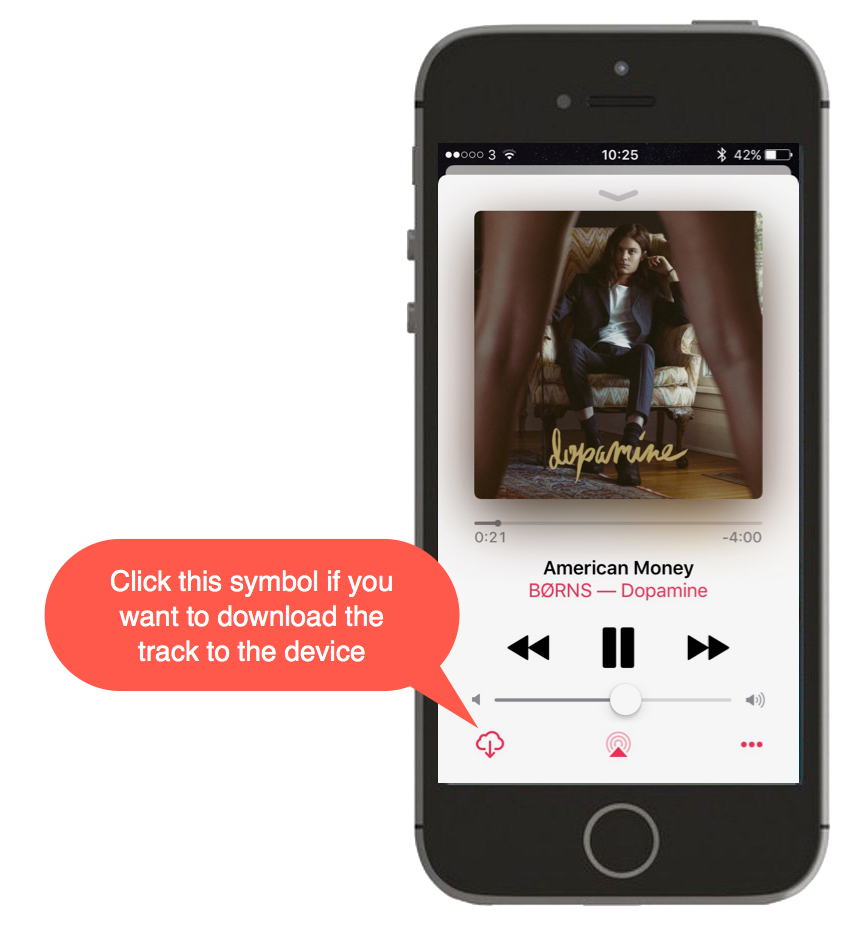
Once it is all in the cloud, you can choose to download only the things you need to listen to offline to the device and you save space! If you have Wi-fi, you can play anything, but you’ll see a cloud symbol if it’s not on the device…
If you select the “Optimise Storage” setting (shown above) any tracks you haven’t played in a while will be deleted from the device to save space. (It will all still be in the cloud though).
Other major advantage of iTunes Match – all your music is available on all your other Apple devices.
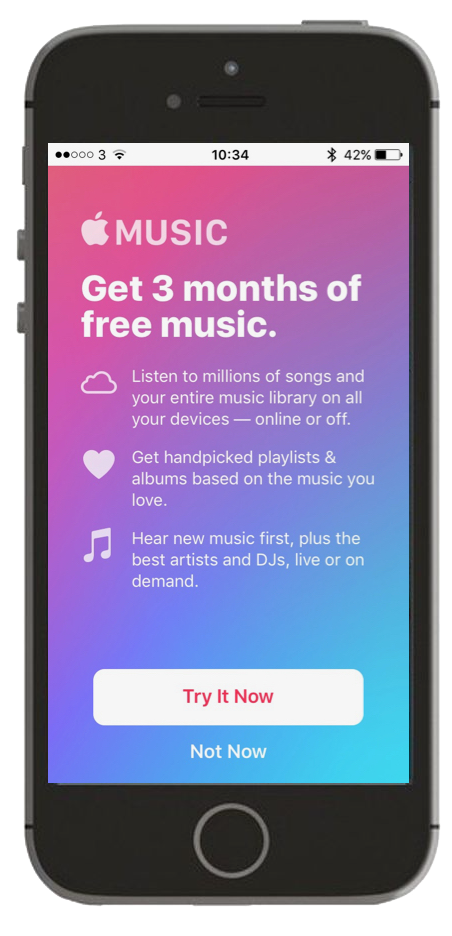
2. Subscribe to Apple Music
Apple’s own streaming service is the ultimate space saver! When you subscribe all your music is simply being streamed but you do need an internet connection and it costs a bit as well!
There are lots of other streaming services available too, but all of the decent ones cost a few quid.
3. Connect your device to iTunes on your computer and sync…
This is very much the old way of managing your music, but it still works!
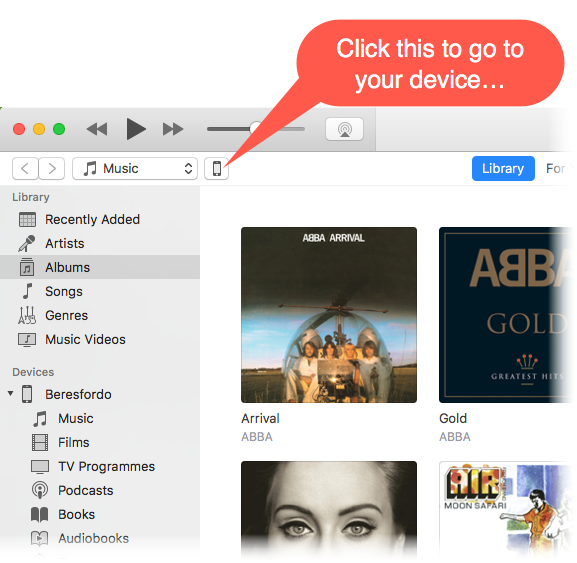
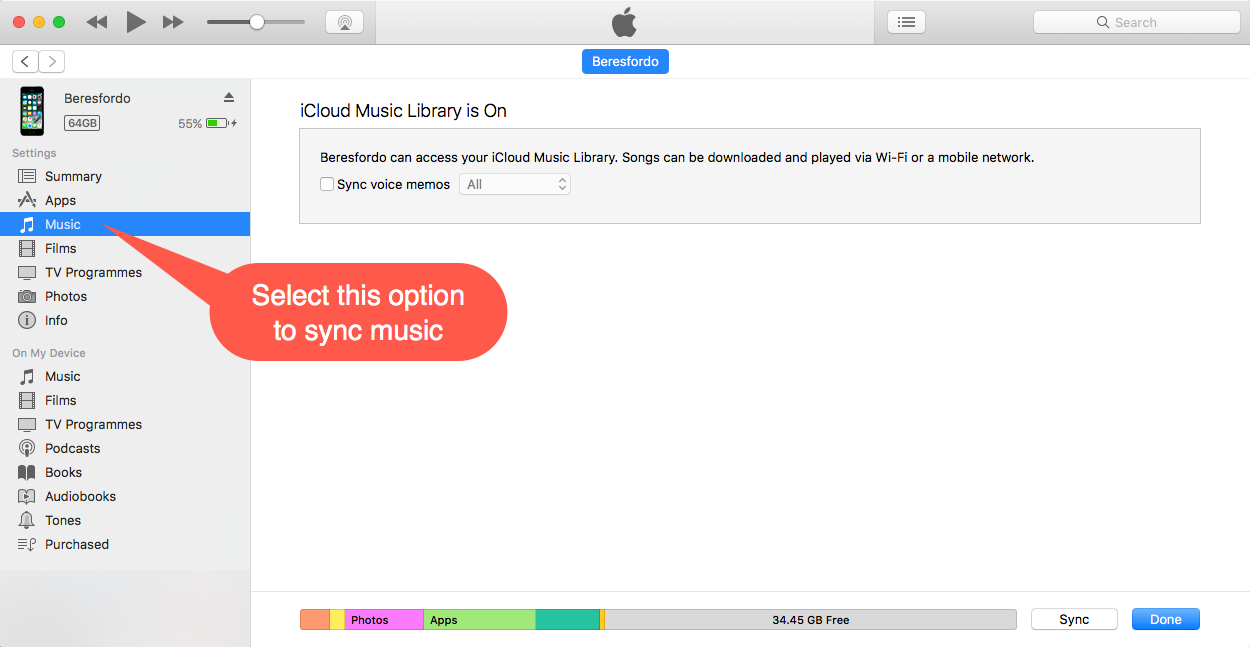
Connect your device via the charging cable to your PC or Mac and select the device symbol…
If you get a welcome message (i.e. this is the first time you’ve ever connected this device to iTunes), select the “Setup as new iPhone/iPad” option – it won’t erase anything – it will just try and do a sync.
If you have iCloud services already like iTunes Match or Apple Music, you won’t be able to sync music (as above).
All in all, saving storage space is doable, if a little tedious. The one lesson I learnt over time though is, try and buy the biggest Apple device you can afford and then keep an eye on usage from the start.

